

In the previous article, we laid the foundations: energy deployment is not a gimmick, it’s a consistency tool. Especially at Lusail, where the 9X8 quickly reminds you that a Hypercar is not driven on mechanical grip alone, but also through energy management.
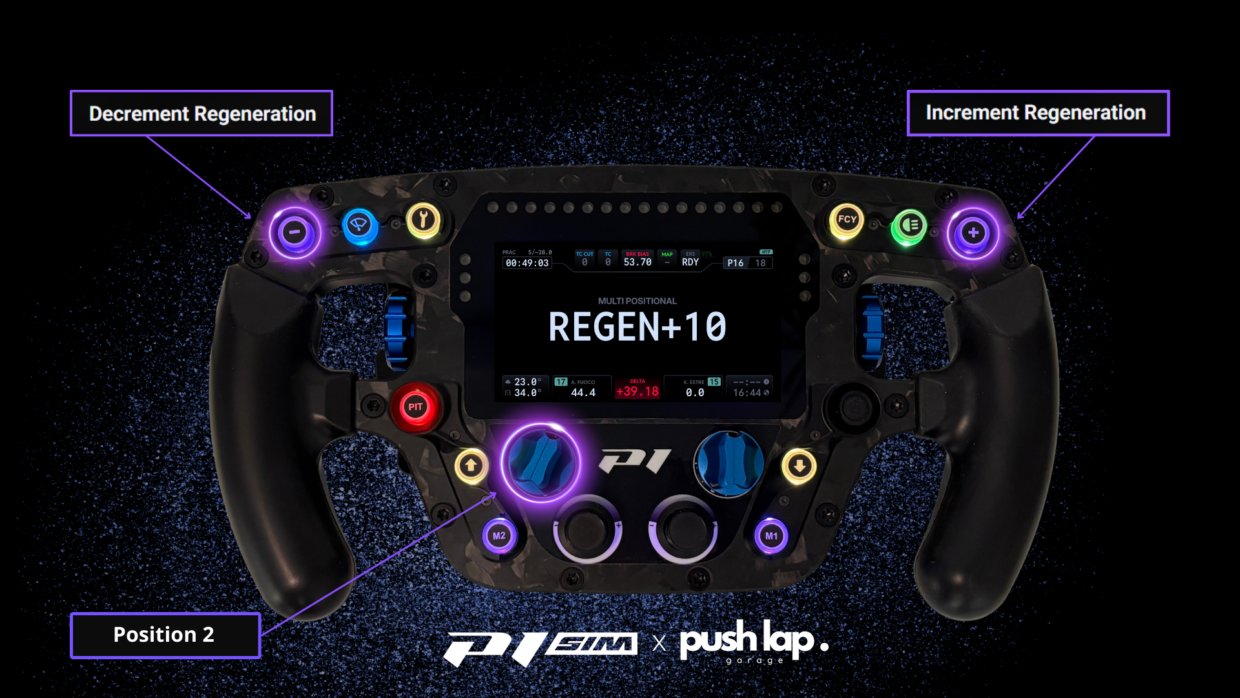
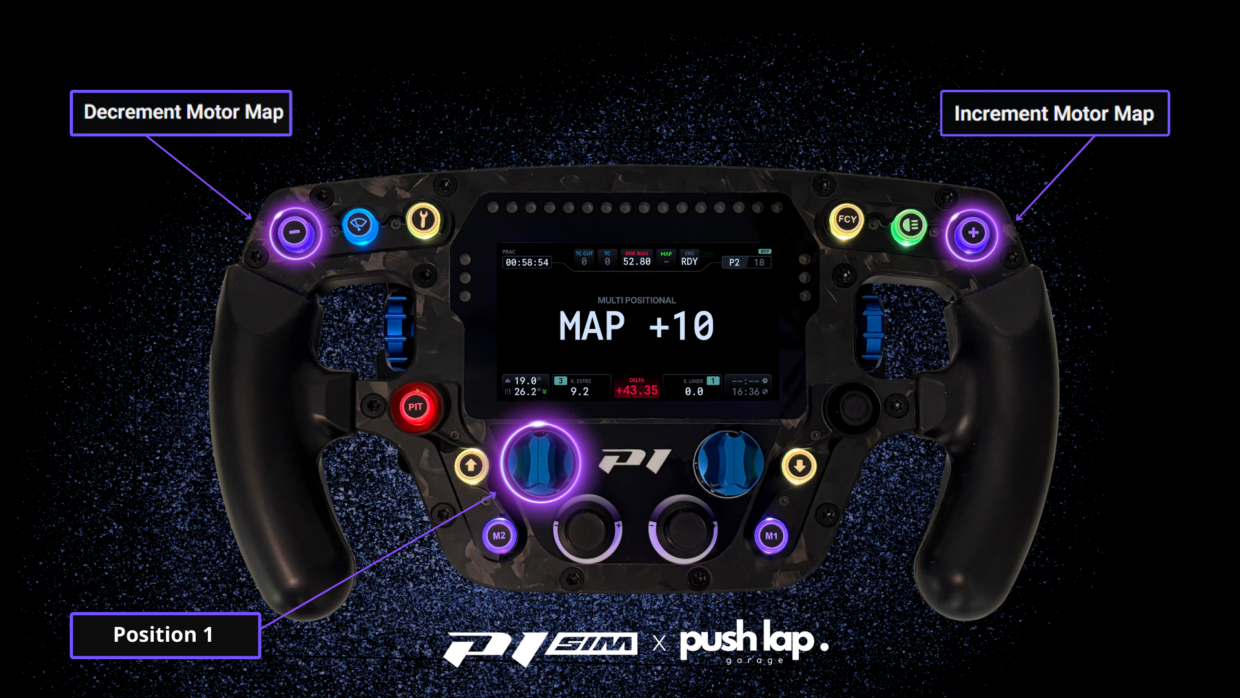
By addressing energy deployment, we placed the first cornerstone of the multiplexing logic: a rotary encoder to define the context, +/– buttons to fine-tune it, and clear on-wheel feedback via the DNR plugin.
Now that deployment is under control, the next step becomes almost mandatory: regeneration. Because in WEC, you don’t win only by “spending energy better” — you also win by recovering it more intelligently. And on the 9X8, regeneration is not a secondary setting: it directly influences braking behaviour, stability, SOC… and ultimately the quality of an entire stint.
Regeneration: Understanding the Principle
Regeneration is the portion of braking energy converted back into electrical energy. Said like that, it sounds simple. In reality, however, you’re not driving a gauge — you’re driving a balance.
More regeneration allows you to recover more energy and stabilise SOC… but it also changes how the car decelerates and settles on corner entry.
Less regeneration can make the car feel more “neutral” or more predictable, depending on your driving style and track conditions.
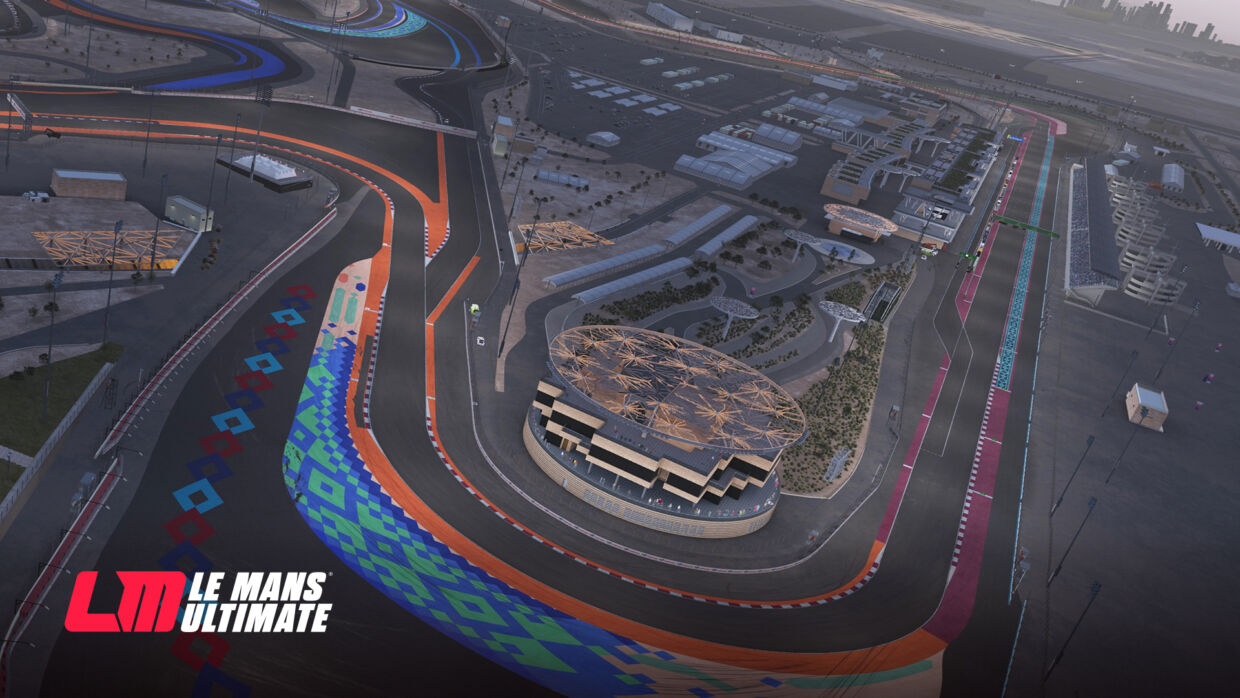
What makes regeneration so critical at Lusail is the circuit profile itself: long loaded phases and braking zones where stability and consistency matter more than aggression. If deployment is “the spending,” regeneration is “the refuelling.” And endurance racing is an economy: spending without recharging is a choice — rarely a profitable one over a stint.
Why Regeneration Must Be Multiplexed
The real challenge of regeneration in racing isn’t understanding the concept. It’s being able to adjust it at the right moment without compromising your driving. It’s knowing — instantly — where you stand in terms of energy. And that’s exactly what multiplexing delivers: making the action obvious, fast, and safe.
Regeneration doesn’t need to be changed every corner, but it must be adjustable when the race demands it: traffic, tyre evolution, changing grip levels, neutralisations, restarts… or simply a drifting SOC.
If you have to take your eyes off the track to search for a value, you’ve already lost the advantage. The wheel must allow on-the-fly adjustment, and the DNR display must immediately confirm what you just did.
SimHub + Control Mapper: Same Method, Even More Critical with Regen
On paper, regeneration looks like an “energy setting.” In practice, it directly affects braking feel and stability. That’s precisely why the SimHub / Control Mapper layer must be rock solid. An unstable Motor Map input is annoying; an unstable regeneration input under braking is the fastest way to end up with a car that reacts unpredictably at the worst possible moment.
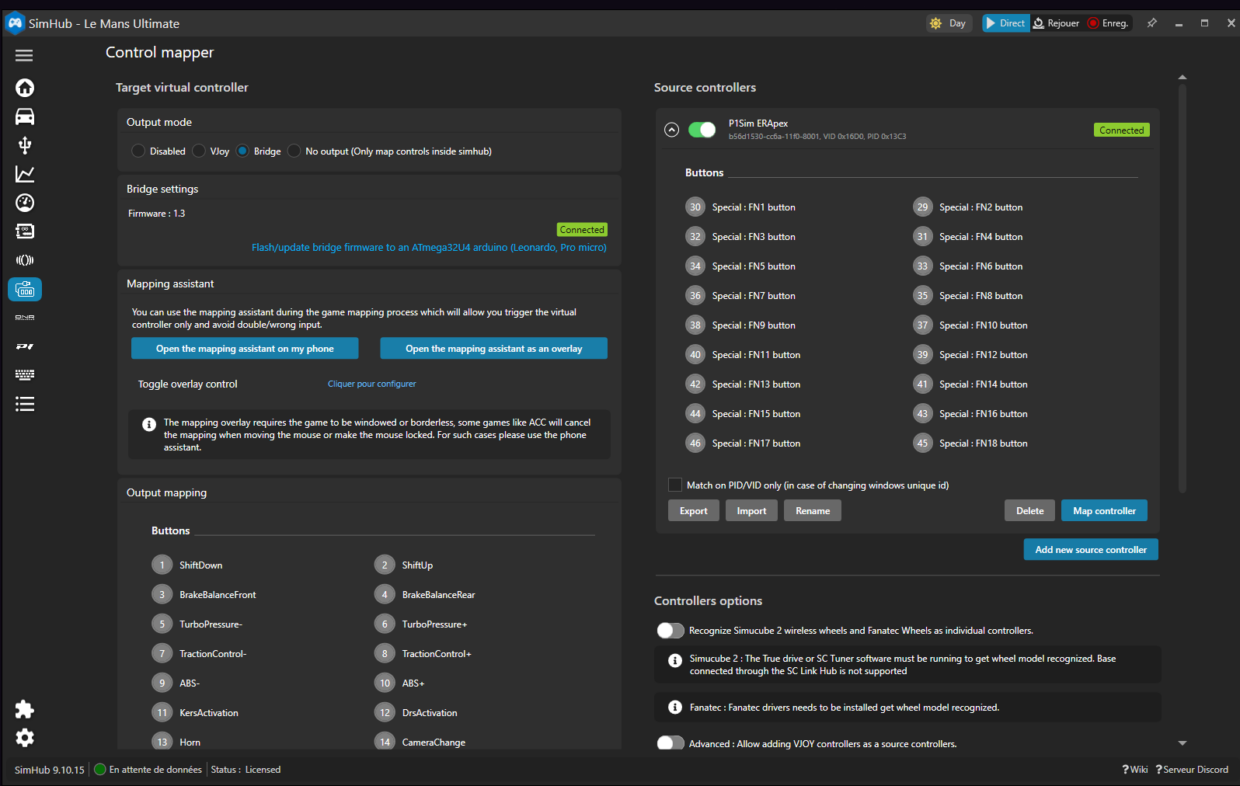
Control Mapper is therefore not a “bonus” in this workflow — it’s the layer that turns wheel inputs into coherent, repeatable commands that DNR can read and display correctly. The logic remains the same as in the previous article:
the wheel is the source
SimHub applies the logic (positions, FN layers, +/–)
DNR displays information that matches reality
the game receives clean, unambiguous commands
For position 2, the discipline is simple: first secure the context (FN03 / FN04), then map the action, then validate the display. This avoids the classic trap of binding everything at once and later wondering “why it jumps” or “why the display doesn’t match.”

DNR Plugin: Renaming FN03 / FN04 to Make Regeneration Truly “Driveable”
You can have the best multiplexing system in the world… if the display doesn’t follow, you end up driving from memory. And in endurance racing, memory helps — but it never replaces clear, immediate feedback on the wheel.
In DNR, FN03 and FN04 are technical layers. Left untouched, they work — but you lose what matters most: instant readability. And the Push Lap Garage logic is always the same: one input = one action = one confirmation. No grey zones.
So we apply exactly the same method used for energy deployment in Article 3: rename FN03 / FN04 with driver-oriented labels, not system-oriented ones. Simple and effective:
FN03 → REGEN +
FN04 → REGEN −

With the 9X8, this isn’t about comfort. Regeneration directly affects braking, stability, and SOC. So when you need to adjust under braking, in traffic, or on a restart, you want an interface that leaves no doubt. DNR isn’t there to look good — it’s there to stop you losing half a second… or the rear of the car.
In LMU: Assigning REGEN + / REGEN – Cleanly
As with Motor Map, the principle in LMU is to bind two simple actions:
Increment Regen (or the exact LMU equivalent)
Decrement Regen
You then assign:
Button 32 (FN03) → Increment (REGEN +)
Button 31 (FN04) → Decrement (REGEN –)
Rotary position: 2
Other exemple: Map Motor
On-Track Method: Using Regen Without Fighting the Car
Regeneration is only useful if it serves your driving. The classic mistake is treating it purely as a “SOC charger” and forgetting that it also shapes braking behaviour.
Here’s a simple logic, inspired by the same philosophy as the deployment article: adjust when it creates an advantage, not when it satisfies a theory.
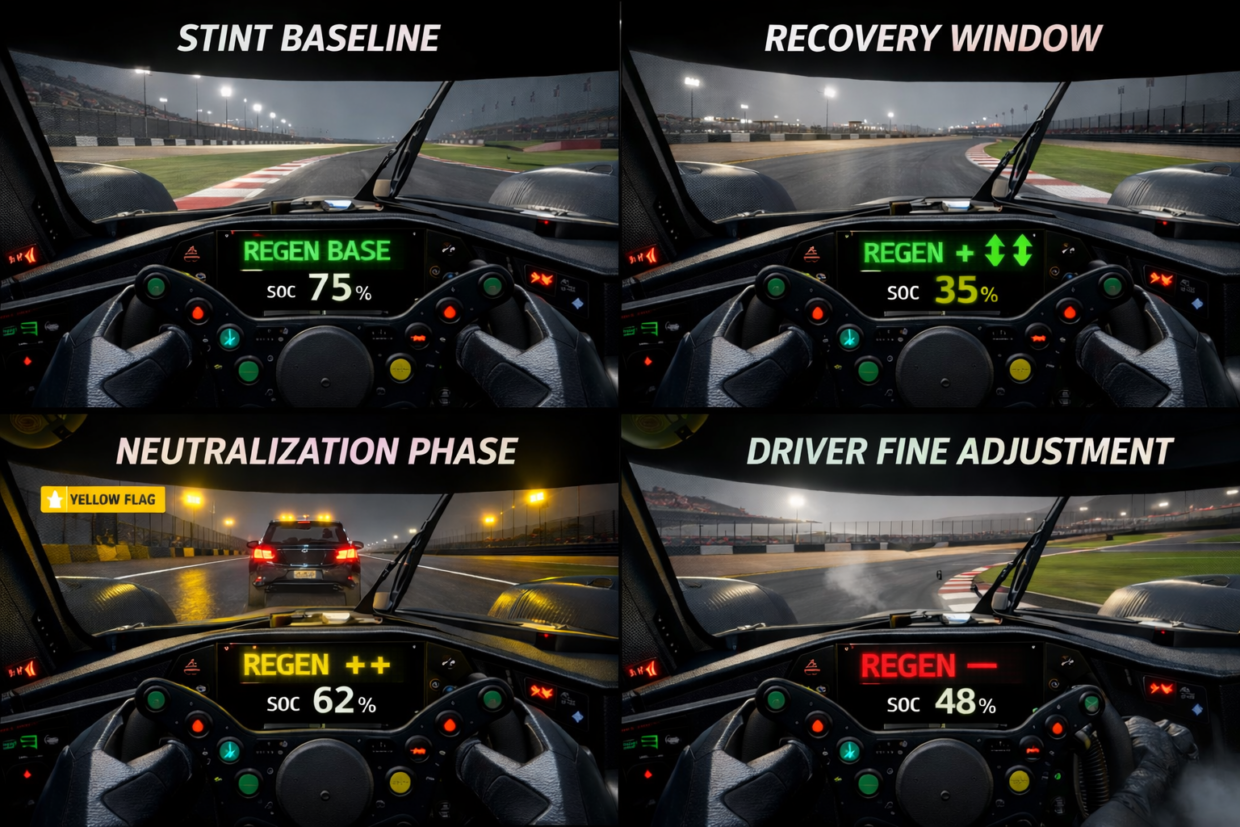
1) “Stint” baseline: stable entries + stable SOC
Target a regen level that gives you repeatable braking and prevents SOC from slowly bleeding out over a run.
Typical recovered power: ~50–80 kW (sweet spot around ~65 kW).
Objective: consistency, tyre management, and a predictable car.
2) “Recovery window”: when SOC drifts
If SOC trends downward despite reasonable deployment, increase regen in small steps — enough to refill, not enough to destabilise entries.
Typical recovered power: ~80–120 kW (sweet spot around ~100 kW).
Objective: recharge without “over-braking” the car into the corner.
3) Neutralisation / slow traffic: recover without suffering
In slow phases, regen becomes pure efficiency: you can harvest more without the same entry-speed sensitivity you’d have in full pace.
Typical recovered power: ~100–150 kW (sweet spot around ~130 kW).
Objective: rebuild SOC while keeping the car calm in accordion driving.
4) “Driver feedback” adjustment: when the car talks back
If the rear feels nervous under braking, or the car becomes inconsistent on entry, back regen off until the platform settles — then rebuild progressively.
Typical recovered power: ~30–60 kW (sweet spot around ~45 kW).
Objective: stability first — regen should support the brake phase, not hijack it.
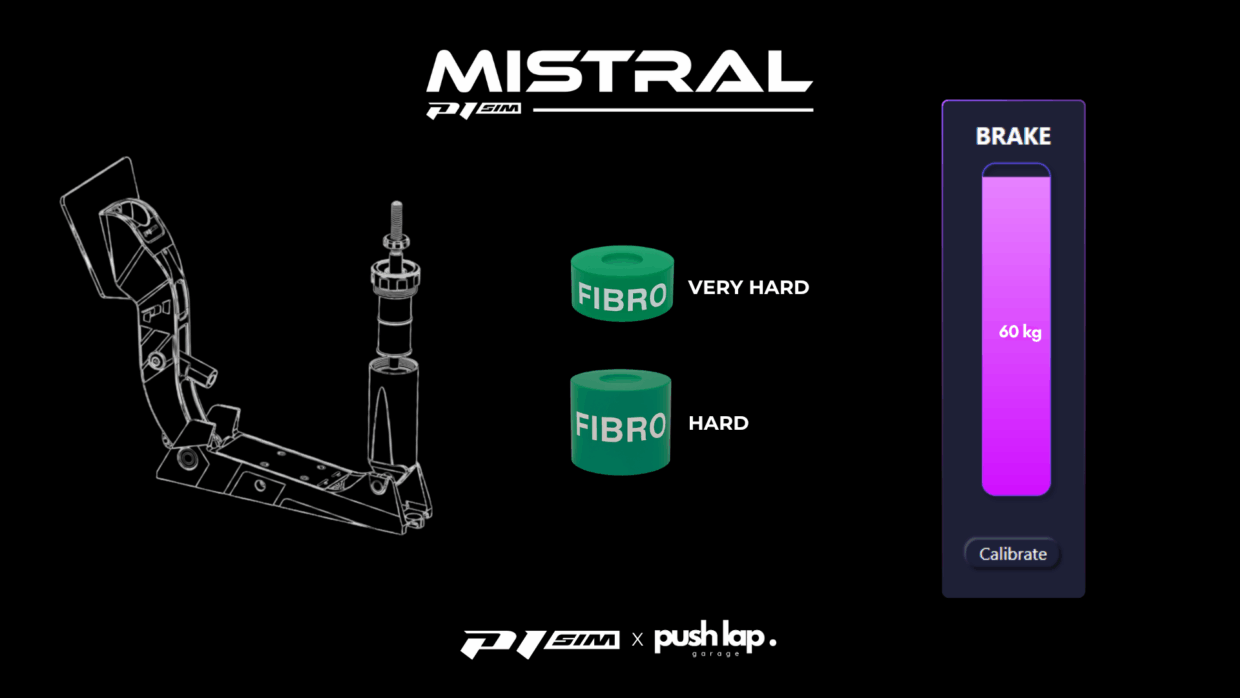
P1 SIM Mistral: The Brake Pedal as an “Energy Sensor”
In our WEC 2026 logic, the wheel (multiplexing) drives the strategy… but the P1 SIM Mistral drives reality.
On a Hypercar like the 9X8, braking is not just about slowing down. It’s where you stabilise the car, define entry speed, and — most importantly — directly influence the quality of energy management (SOC and recovery).
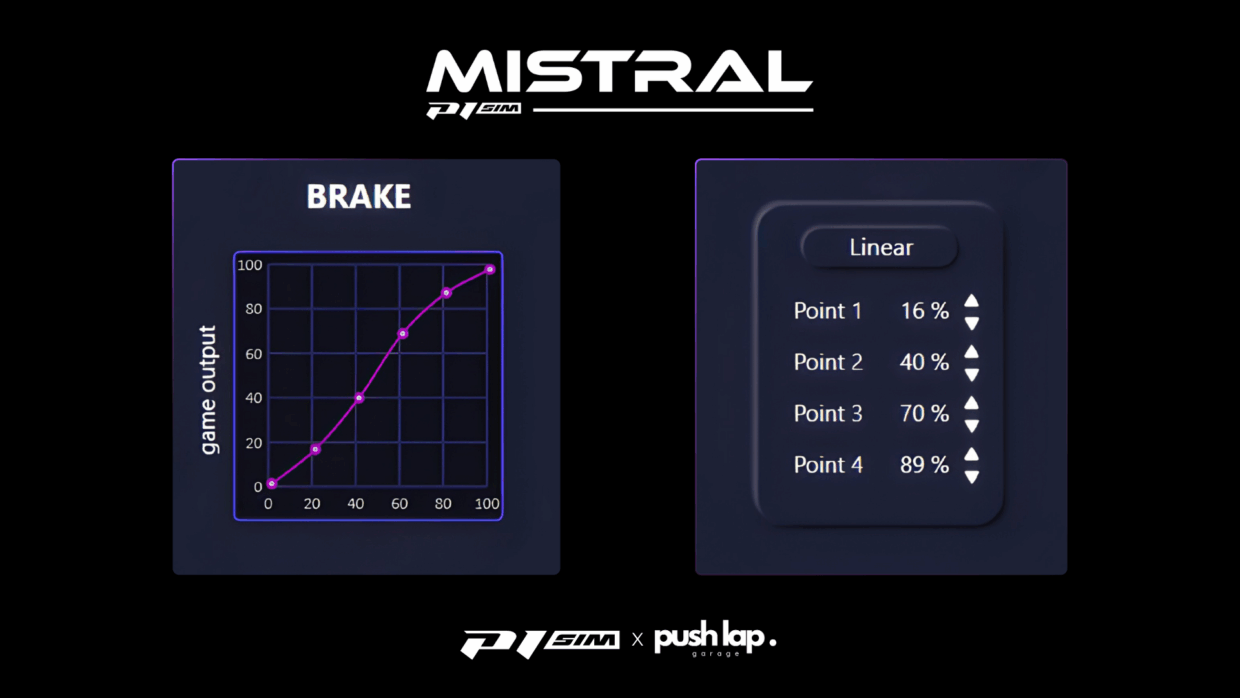
This is precisely why the P1 SIM brake curve in SimHub becomes a strategic lever. It allows you to tailor brake response to your force, modulation style, and hybrid demands — instead of suffering a generic response that is either too brutal or too linear.
A custom curve delivers three tangible benefits. First, it smooths the initial zone, preventing unintended micro-brake inputs that disturb stability and can trigger “parasitic” regeneration or overloaded entries. Second, it makes the mid-range more progressive and readable, improving trail braking and pressure repeatability — essential for maintaining a coherent energy strategy over an entire stint without rhythm drift.
Finally, it provides a more controlled ramp-up toward high pressures, allowing you to reach peak braking consistently without stamping on the pedal as if you were trying to destroy it.
Ultimately, the curve is not about comfort — it’s calibration. It aligns your input (foot force) with a useful on-track outcome (pressure, stability, recovery). And that’s exactly what turns the 9X8’s energy management into a usable tool: the wheel selects the mode, but the pedal guarantees that the car enters the corner the same way… lap after lap.
Conclusion
Energy deployment taught you how to use energy as a pace tool. Regeneration teaches you how to build a stint: stabilising SOC, shaping the braking phase, and giving continuity to your driving.
With position 2 on the rotary, you retain the same ergonomics as Motor Map: a clear context, simple adjustments, and DNR feedback that keeps you from driving blind.
And this naturally opens new perspectives. How to fully exploit multiplexing with functions such as Traction Control or ABS.
We’ll definitely return to these topics in upcoming articles, while continuing our journey toward the Qatar circuit — and exploring a new vehicle along the way.
Leave a Comment